Blog Layout

Enhance Your Garage with Drywall Installation

March 25, 2024

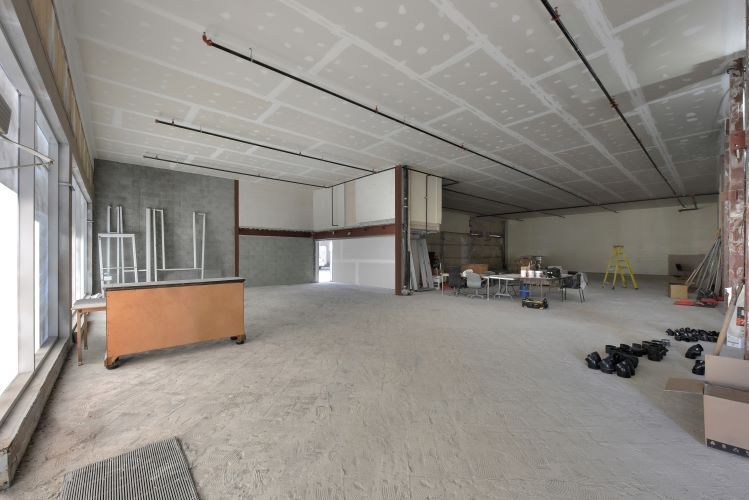
When it comes to home improvement projects, the garage is often overlooked as an area worthy of attention. However, with the right upgrades, such as drywall installation, your garage can become a functional and aesthetically pleasing space that adds value to your home. At Chatham-Kent Drywallers, we specialize in providing professional drywall installation services for garages in Chatham, Ontario. In this article, we'll explore the importance of garage drywall installation and how it can transform your space.


Enhanced Appearance:

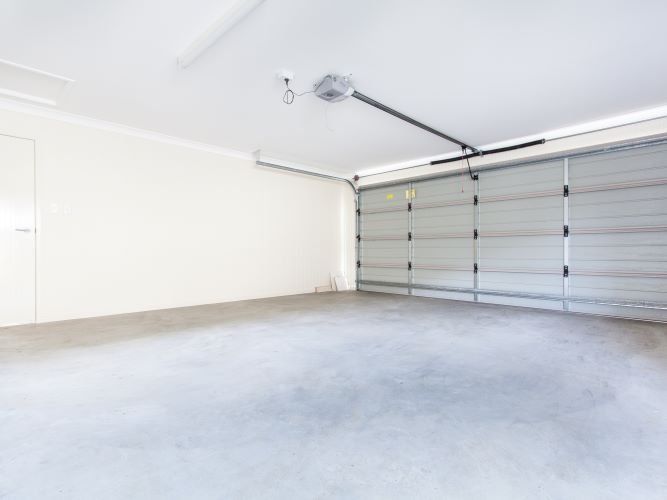
One of the primary benefits of garage drywall installation is the enhancement of the overall appearance of the space. Without drywall, garages often have exposed studs, insulation, and bare concrete walls, which can give the space a rough and unfinished look. By installing drywall, you can create a clean and polished finish that instantly elevates the appearance of your garage, making it more inviting and visually appealing.


Improved Insulation:

Another significant advantage of garage drywall installation is improved insulation. Garages tend to be colder in the winter and hotter in the summer compared to the rest of the house, especially if they are uninsulated or poorly insulated. Drywall acts as an additional barrier against temperature fluctuations, helping to regulate the indoor temperature and create a more comfortable environment year-round. This is particularly beneficial if you use your garage for hobbies, storage, or as a workspace.


Enhanced Durability:

Drywall installation in the garage also adds an extra layer of protection to the walls, making them more durable and resistant to damage. Whether you accidentally bump into the walls with a tool or equipment, or if the walls are exposed to moisture or humidity, drywall provides a sturdy and resilient surface that can withstand everyday wear and tear. This durability ensures that your garage walls remain in good condition for years to come, reducing the need for frequent repairs or maintenance.


Increased Functionality:

By installing drywall in your garage, you can increase the functionality of the space and expand its potential uses. Finished walls provide a more versatile backdrop for hanging shelves, cabinets, tool racks, and other storage solutions, allowing you to maximize the available space and keep your garage organized and clutter-free. Additionally, drywall installation creates a smoother surface for painting or finishing, giving you the flexibility to customize the space to suit your specific needs and preferences.


Enhanced Safety and Security:

Drywall installation also enhances the safety and security of your garage. With finished walls, there are fewer exposed surfaces and potential hazards that could cause injury or accidents. Additionally, drywall provides an additional layer of protection against intruders and unauthorized access, making your garage more secure and protecting your belongings stored inside.


Professional Installation by Chatham-Kent Drywallers:

When it comes to garage drywall installation, it's essential to trust the job to professionals like Chatham-Kent Drywallers. Our team of experienced drywall installers has the knowledge, skills, and expertise to handle all aspects of the installation process, from preparing the walls to taping, mudding, sanding, and finishing. We use high-quality materials and precision techniques to ensure a flawless finish that meets your expectations and stands the test of time.


Conclusion:

Garage drywall installation is a valuable investment that can significantly enhance the appearance, functionality, and durability of your garage. Whether you're looking to create a more attractive space, improve insulation, increase storage options, or enhance safety and security, drywall installation offers numerous benefits for homeowners in Chatham, Ontario. With professional installation by Chatham-Kent Drywallers, you can transform your garage into a versatile and functional space that adds value to your home. Contact us today to learn more about our drywall installation services and schedule a consultation for your garage project.

You might also like

May 17, 2024
Drywalling a ceiling is a key component in any home improvement project. It provides a smooth, uniform surface that can be painted or textured to match your interior decor. At Chatham-Kent Drywallers, we understand the importance of a properly installed ceiling and are here to guide you through the process. This article will walk you through the essential techniques and steps involved in drywalling a ceiling . Tools and Materials Needed Before you begin, gather the necessary tools and materials: Drywall sheets (usually 1/2 inch thick for ceilings) Drywall screws Drywall tape Joint compound (mud) Utility knife T-square Drywall lift (optional, but highly recommended) Screw gun or drill with a drywall bit Mud pan and taping knife Sanding block or pole sander Measuring tape Ladder or scaffolding Step-by-Step Process 1. Preparation Measure and Plan: Measure the dimensions of your ceiling to determine the number of drywall sheets required. Plan the layout, ensuring that the joints between sheets do not align with joints on the walls. This will add strength to the ceiling. Mark Joists: Use a stud finder to locate and mark the ceiling joists. This will guide you when attaching the drywall sheets. 2. Cutting the Drywall Measure and Mark: Measure the length and width of the first section of the ceiling. Use a T-square to mark the dimensions on the drywall sheet. Cut the Drywall: Score the drywall along the marked line using a utility knife. Snap the drywall along the score line and cut through the paper backing. 3. Installing the Drywall Position the Drywall: With the help of a drywall lift or an assistant, position the first sheet of drywall against the ceiling joists. Secure the Drywall: Drive drywall screws through the drywall into the joists, spacing them about 12 inches apart. Start from the center of the sheet and work your way outwards to avoid bulges. Repeat the Process: Continue measuring, cutting, positioning, and securing the drywall sheets until the entire ceiling is covered. 4. Taping and Mudding Apply Drywall Tape: Cover all joints between drywall sheets with drywall tape. Use mesh tape for added strength and ease of use. First Coat of Mud: Apply a thin coat of joint compound over the tape using a taping knife. Smooth it out to ensure it blends seamlessly with the drywall surface. Let it Dry: Allow the first coat to dry completely, which usually takes about 24 hours. Second Coat: Apply a second coat of joint compound, extending it a few inches beyond the first coat to feather out the edges. Smooth it out and let it dry. Final Coat: Apply a third, final coat of joint compound to achieve a smooth finish. Sand the dried compound using a sanding block or pole sander to remove any imperfections. 5. Finishing Touches Inspect and Touch Up: Inspect the ceiling for any missed spots or imperfections. Apply additional joint compound if necessary and sand again. Prime and Paint: Once the drywall is smooth and free of dust, apply a primer to the ceiling. Finish with a coat of paint or texture to match your desired look. Tips and Tricks Use a Drywall Lift: Renting a drywall lift can save you a lot of effort and make the installation process safer and more efficient. Stagger the Seams: Ensure that the seams between drywall sheets are staggered to increase the structural integrity of the ceiling. Lightweight Drywall: Consider using lightweight drywall for ceilings to make handling and installation easier. Safety First: Always wear safety glasses and a dust mask to protect yourself from dust and debris. Conclusion Drywalling a ceiling may seem daunting, but with careful planning and the right techniques, you can achieve professional-looking results. At Chatham-Kent Drywallers, we specialize in drywall installation and finishing. Whether you’re undertaking a DIY project or need expert assistance, our team is here to help. Contact us today for all your drywall needs and let us ensure your ceiling is finished to perfection. 
May 14, 2024
When it comes to constructing commercial buildings, choosing the right materials is essential for achieving durability, functionality, and aesthetic appeal. Drywall, also known as gypsum board or plasterboard, is a versatile building material widely used in commercial construction projects due to its affordability, ease of installation, and fire-resistant properties. In this article, we'll explore the different types of drywall commonly used in commercial buildings and their applications. 1. Regular Drywall: Regular drywall, also known as standard drywall or gypsum board, is the most common type of drywall used in commercial construction. It consists of gypsum plaster sandwiched between layers of paper, providing a smooth and uniform surface for painting or finishing. Regular drywall is suitable for interior walls and ceilings in commercial buildings where fire resistance and sound insulation are not primary concerns. 2. Fire-Resistant Drywall: Fire-resistant drywall, also known as Type X drywall, is specifically designed to provide enhanced fire protection in commercial buildings. It contains fiberglass or other additives that increase its resistance to fire, allowing it to withstand high temperatures for an extended period. Fire-resistant drywall is commonly used in areas where building codes require fire-rated materials, such as stairwells, corridors, and mechanical rooms. 3. Moisture-Resistant Drywall: Moisture-resistant drywall, also known as green board or blue board, is designed to withstand moisture and humidity better than regular drywall. It has a water-resistant gypsum core and a moisture-resistant paper facing, making it ideal for use in commercial buildings' bathrooms, kitchens, and other areas prone to moisture exposure. Moisture-resistant drywall helps prevent mold and mildew growth, ensuring a durable and long-lasting interior finish. 4. Soundproof Drywall: Soundproof drywall, also known as acoustic drywall or sound-dampening drywall, is engineered to reduce noise transmission between rooms and floors in commercial buildings. It features multiple layers of gypsum and sound-absorbing materials, such as viscoelastic polymers or mineral wool, that absorb and dissipate sound waves. Soundproof drywall is commonly used in offices, conference rooms, and other areas where privacy and noise control are essential. 5. Impact-Resistant Drywall: Impact-resistant drywall, also known as abuse-resistant drywall or high-impact drywall, is designed to withstand heavy impacts and physical abuse in high-traffic areas of commercial buildings. It features a reinforced core and a durable fiberglass or paper facing that resists dents, scratches, and other damage. Impact-resistant drywall is commonly used in schools, hospitals, and public facilities where walls are prone to damage from equipment, furniture, or foot traffic. In conclusion, the type of drywall used in commercial buildings depends on various factors such as fire resistance, moisture resistance, sound insulation, and impact resistance. By understanding the different types of drywall available and their applications, contractors can select the most suitable materials for their specific project requirements. As experienced professionals at Chatham-Kent Drywallers, we specialize in providing high-quality commercial drywall installation services tailored to meet our clients' needs. Contact us today to learn more about how we can help with your commercial construction project!
May 13, 2024
Drywall mudding , also known as taping and finishing, is a crucial step in the drywall installation process that transforms a raw wall into a smooth and seamless surface ready for painting or wallpapering. As experts in drywall finishing, Chatham-Kent Drywallers understands the importance of mastering the art of mudding to achieve flawless walls that elevate the aesthetics of any space. In this article, we'll delve into the purpose of mudding in drywall finishing and the techniques involved in achieving professional results. 1. Filling and Concealing Joints: One of the primary purposes of mudding is to fill and conceal the joints between drywall panels. When installing drywall, seams are inevitable, resulting in visible gaps between panels. Mudding involves applying joint compound, also known as mud, over these joints to create a smooth and seamless surface. This process effectively hides the joints, ensuring that the finished wall appears uniform and cohesive. 2. Smoothing Out Imperfections: In addition to concealing joints, mudding is also used to smooth out imperfections on the surface of the drywall. During the installation process, seams, screw indentations, and other irregularities may occur, detracting from the overall appearance of the wall. Mudding allows skilled drywall finishers to fill in these imperfections and create a level surface that is free of bumps, ridges, or depressions. 3. Reinforcing Seams and Corners: Mudding serves a functional purpose beyond aesthetics by reinforcing seams and corners to prevent cracking or separation over time. By applying multiple layers of joint compound and embedding drywall tape into the mud, drywall finishers create a strong bond that ensures the long-term integrity of the walls. This reinforcement helps to minimize the risk of future damage and prolongs the lifespan of the drywall installation. 4. Creating a Smooth Texture: The final purpose of mudding is to create a smooth texture on the surface of the drywall that is conducive to painting, wallpapering, or other finishing techniques. Skilled drywall finishers use specialized tools and techniques to achieve a seamless transition between the mudded areas and the rest of the wall. This smooth finish provides the perfect canvas for applying paint or other decorative treatments, resulting in a polished and professional look. In conclusion, drywall mudding plays a vital role in the finishing process, transforming raw drywall panels into smooth and seamless walls that enhance the beauty and functionality of any space. By filling and concealing joints, smoothing out imperfections, reinforcing seams and corners, and creating a smooth texture, mudding ensures that the finished walls meet the highest standards of quality and craftsmanship. With Chatham-Kent Drywallers' expertise in drywall finishing, you can trust that your walls will be impeccably mudded and ready to impress.
More Posts

Book a Service Today

Share by: